HOW TO INSULATE A ROOF
As there are many types of roof space, there is multiple ways to insulate them. The 2 most common being a standard loft space that is uninhabited that may be used for storage or the 'room-in-the-roof' type that provides additional living space. In either instance, it is vital to make sure the roof is insulated properly to prevent heat loss, meet building regulations where applicable but most importantly to save money on heat loss. The heating bills aren't going to get any cheaper!
How do I insulate my loft space?
Before you make a start, preparation is key:
• Safety First: Make sure the loft is well-ventilated and free from hazards. Wear appropriate safety gear, including gloves and a mask.
• Check Existing Insulation: If there's already insulation, assess its condition and thickness. You may need to top it up or replace it entirely.
• Plan the Layout: Measure the loft space to determine how much insulation you need. Consider the layout of joists and any obstacles like pipes or wiring.
What Materials do I need?
• Insulation: Choose between mineral wool rolls or rigid insulation boards. Mineral wool is more common for lofts, but rigid boards are suitable for flat roofs or sloped ceilings. Here we look at installing loft insulation rolls. It is important to make sure the loft roll selected is the correct width to it can fit neatly between the rafters.
• Loft Ladder: Ensure safe access to the loft.
• Protective Gloves and Mask: To protect yourself from irritants.
• Utility Knife: For cutting insulation to size.
• General Purpose Saw: For cutting through insulation rolls at the correct width to suit joist spacings.
• Tape Measure: To measure the loft space.
Let's get started!
1. Clear the Loft: Remove any stored items from the loft floor to create a clear working area.
2. Lay the First Layer: To save balancing on rafters, it is advisable to use some sort of loft boards or planks that are strong enough to be able to kneel and walk on. Once in place, measure the gap between the roof timbers and lay the insulation rolls between the joists, starting from the furthest point from the loft hatch. Ensure it fits snugly and covers the entire space. In an ideal world, the top of the insulation would sit flush with the top of the timber rafter.
3. Add a Second Layer (Optional): For better insulation, working from the edges inwards, lay a second layer of rolls perpendicular to the first layer. This creates a more effective barrier against heat loss. Typical application on new build properties would be 270mm overall depth but may vary depending on the local authority. It is always worthwhile checking this with your Building Control office if unsure.
4. Insulate Around Obstacles: Cut the insulation to fit around pipes, wiring, and other obstructions. Make sure there are no gaps.
5. Insulate the Loft Hatch: Fit an insulated loft hatch cover to prevent heat loss through the access point.
6. Insulate Water Tanks and Pipes: Wrap insulation around any exposed water tanks and pipes in the loft.
How to I insulate your attic roof?
Preparation is again key.
• Safety First: Make sure the roof space is well-ventilated and free from hazards. Wear appropriate safety gear, including gloves and a mask.
• Plan the Layout: Measure the loft space to determine how much insulation you need. Consider the layout of roof timbers, any openings such as dormers or VELUX Windows and any obstacles such as wiring.
• Access: As room-in-the-roof spaces are habitable, it is usually to have a fixed staircase leading to them. This is handy as the rigid insulation sheets required are normally sourced in 2400 x 1200mm. It is great if these can be cut to size in the working area for ease of use.
• Install Battens (if necessary): If your rafters are too narrow to accommodate the PIR boards and a ventilation gap, you'll need to install battens to create the space. Attach the battens to the rafters using screws or nails, ensuring they are level.
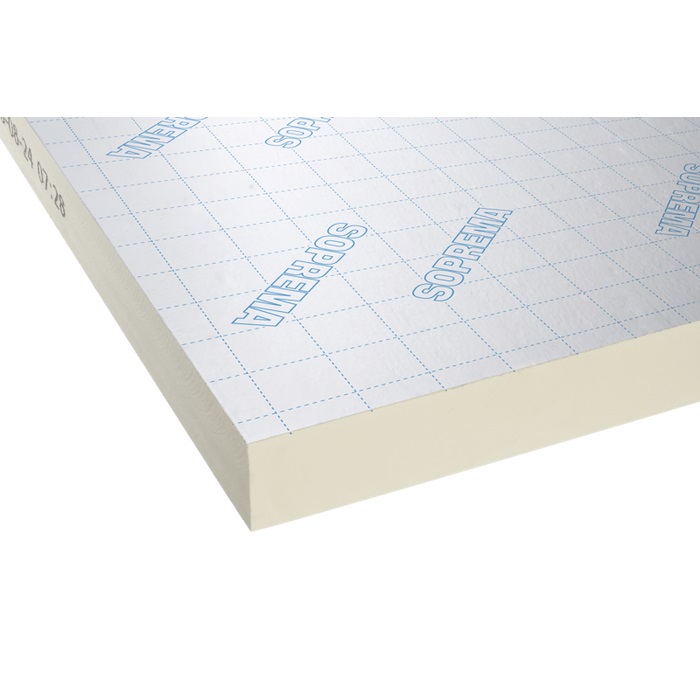
What type of rigid insulation board should I use?
In most instances, standard PIR insulation boards such as Celotex are used which come in a variety of thicknesses from 25mm to 200mm. When a higher level of insulation is required, you may need to use Kingspan Kooltherm K107 boards. These have phenolic insulation rather than PIR (Polyisocyanurate) which is gives a premium performance. Here we look at installing rigid insulation boards The process for both these board types is the same.
It is important to make sure the depth of board selected will fit between the roof timbers allowing for a minimum 50mm air gap at on the roofside of ther sheet.
What tools will I need?
• Loft Ladder: If there is no access via a staircase, suitable loft ladders will need to be used.
• Protective Gloves and Mask: To protect yourself from irritants.
• Utility Knife: For cutting thinner insulation boards to size.
• General Purpose Saw: For cutting through thicker insulation sheets (above 50mm) at the correct width to suit roof timber spacings.
• Tape Measure: To measure the roof space and for sheet cutting.
Begin the install!
1. Prepare the Loft: Clear the loft of any obstructions. Ensure the roof structure is sound and free from any damage. Wear appropriate safety gear.
2. Check Ventilation: Make sure there's adequate ventilation in the loft, including soffit vents and ridge vents. This is crucial for preventing moisture buildup and ensuring the insulation works effectively.
3. Install Battens (if necessary): If your rafters are too narrow to accommodate the PIR boards and a ventilation gap, you'll need to install battens to create the space. Attach the battens to the rafters using screws or nails, ensuring they are level.
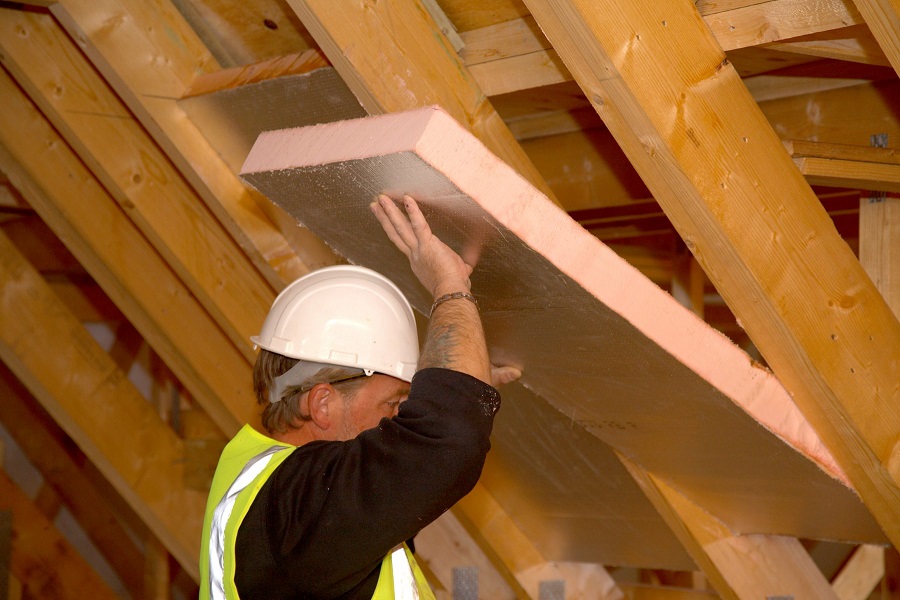
4. Measure and Cut PIR Boards: Measure the space between the rafters and cut the PIR boards to fit snugly. Use a utility knife or jigsaw for accurate cuts.
5. Install PIR Boards: Slide the cut PIR sheets between the rafters, If cut correctly, the boards should just friction fit but additional screws or nails can be used to stop them falling out.
6. Seal Gaps: Use Expanding Foam to fill any gaps around the edges of the PIR boards and where they meet the rafters. Once the foam has cured, trim any excess.
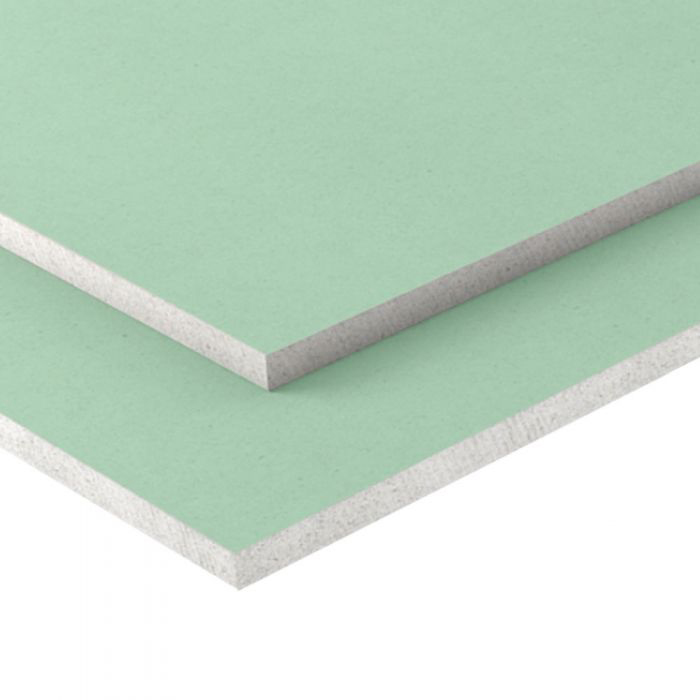
7. Finish: If you plan to finish the roof space, you can now install plasterboard or other suitable materials over the insulation. In certain circumstances, namely when there isn't sufficient rafter depth, it may be required for building regulations to fix an insulated plasterboard such as Kingspan Kooltherm K118 or Celotex PL4000 Ensure any electrical wiring or plumbing is properly insulated and protected.
Important Considerations:
Thickness of insulation
The thickness of the PIR boards depends on your specific needs and building regulations.
Air Gap
Maintain a 50mm air gap between the insulation and the roofing material for proper ventilation.
Fire Safety
Ensure the insulation and any materials used comply with fire safety regulations.
Professional Help
If you're unsure about any part of the process, consider consulting a professional insulation installer.
Additional Tips:
• Wear gloves and a mask when handling PIR boards as they can irritate skin and lungs.
• Take your time and ensure accurate measurements and cuts.
• Consider using a thermal imaging camera to check for any heat loss after the insulation is installed.
By following these steps, you can effectively insulate your roof timbers with PIR insulation, improving your home's energy efficiency and reducing heating costs.
Whether you're insulating a roof or any other part of a building, you can be safe in the knowledge that Buildershop can offer a product to suit at great prices. Please get in touch if any further assistance is required.